

Have you always wanted a wet bar in your home, but don’t have room or the money to make it happen? I got you! Today I have an easy DIY project for a space-saving, super low budget, attractive and functional cocktail station, that you could build in your kitchen, as I have, or virtually anywhere in your home that you have a little wall space.

I always dreamed of having one of those swanky retro portable wet bars like you see in the movies. I fantasized about hosting cocktail parties and standing behind my bar whipping up martinis for my guests, hair up in victory rolls, clad in a swing dress with my cocktail shaker in hand. So you can imagine my excitement when the time came for us to move to Kansas City and into our first home that wasn’t an apartment or shared with other people.
Wake up call! It’s a pain to roll my hair every time we have guests. I grew out of my swing dresses 200 pizzas, a few cookies, and who knows how many beers ago. I have a small home and a lot of crap. Those bars are REALLY expensive.
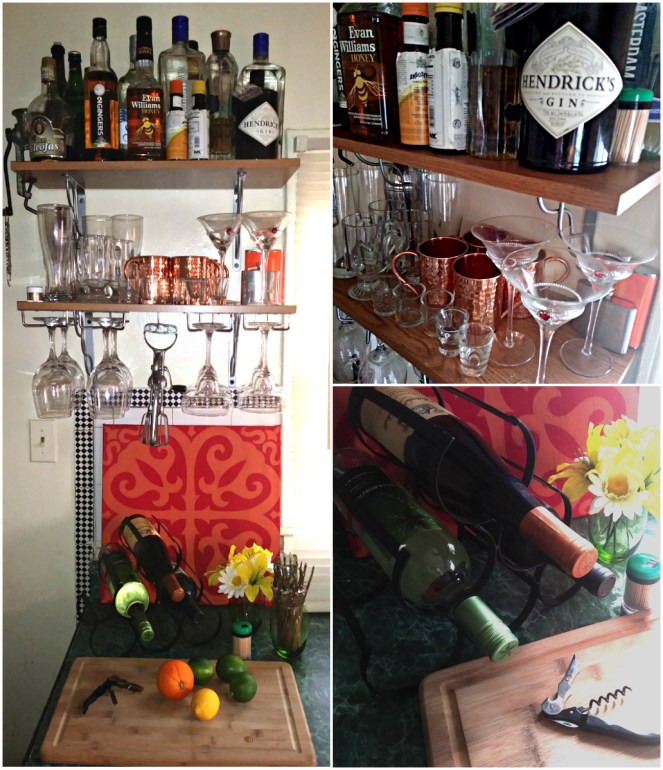
I did, however, figure out a way to have my cake and eat it too. I built* a verticle bar in my kitchen over spare counter space. It houses spirits, glassware, and a few utensils, doesn’t take up ANY of my already in short supply cupboard space, and I can mix drinks right underneath it, on my countertop. Best of all, I did it for under $100 (booze, glassware, and other bar tools not included)!
*Disclaimer: When I say “I built”, I really mean, “I bought stuff, MY HUSBAND built”.
You will need:
- Two flat 10″ deep wall shelves and two pairs of decorative support brackets. I found these at my local home improvement store for about $10 per shelf and $10 per pair of supports. (how long these shelves should be will depend on how much space you have to work with. Remember that with longer shelves, you may need additional support for the center, so plan accordingly)
- 10″ Under-cabinet stemware racks. I used 4 of them and found them on Amazon for about $9 per pair.
- Drill
- Tape measure
- Drywall anchors/screws
- Small tabletop wine rack. (I found mine at a thrift shop for $5)
- Optional- Large cutting board. (I got my 18″x12″ bamboo board for around $20 on Amazon)
Putting this together is pretty self-explanatory. Leave yourself enough room in between shelves for the things you wish to store there. Basically, what I did was, I measured my tallest set of glassware, and my stemware, and placed the shelving to ensure that the hanging bar glasses were well out of the way so I could comfortably work beneath them, and still be able to reach them and the other glassware easily, and that there was at least a 2 inch clearance between the glassware and the top shelf. I do need a step stool to reach the spirits if my husband isn’t available, but, it’s the same thing for the top shelf in my cupboards so I didn’t mind much.
DO NOT skip the drywall anchors. Those glasses and bottles are a heavy load for any shelf, so cutting this corner is asking for disaster. Drill holes in the wall for the anchors, hammer or screw them (depending what type of anchor you have) into the holes, then screw into them to attach your shelving supports to the wall.
On the bottom of your lower shelf, attach your stemware racks. The ones I bought came with small screws and those were sufficient to hold them in place. If you get racks that do not come with their own hardware, make sure you purchase screws that are not too long. You don’t want them poking out the other side of your shelf. I had some space in between my pairs of brackets, as may you. You can fill this space with another bracket if you choose, but another good idea would be to screw in some utility hooks to hang things like bottle openers, corkscrews, or a bar towel from. I personally used this space to hang an antique hand mixer that I had laying around to add a cute decorative touch. The possibilities are endless.
My countertop beneath the shelving is my workstation. I keep the wine rack against the wall, and there is still plenty of space to mix drinks. If you are building this in an area other than the kitchen, a small cart, or accent table works well for this purpose.
That’s all there is to it! Easy-Peasy right?
Other things you may want to make sure you have handy for your new bar are:
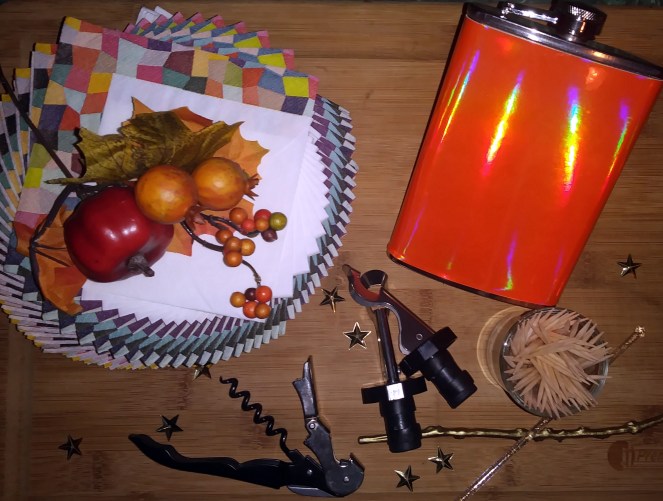
- swizzle sticks
- wine stoppers
- bottle opener
- corkscrew
- cocktail shaker
- straws
- flasks (for cheap nights out, or to bring with you to parties)
- toothpicks
- cocktail napkins
If you are looking for some interesting cocktails to make, here are a few ideas:
Would you be interested in a post about how to make basic cocktails (for example; Cosmopolitan, Basic Martini, Long Island, ect.), and what you need to stock an all-purpose bar in your home? Let me know in the comments!
Thank you so much for reading!


This is such a cool idea and I might implement it when I get my first actual house! It looks awesome, and it would be such a cool addition to a house
Alex x
http://allthingsalexx.wordpress.com
LikeLiked by 1 person
It really comes in handy. And it frees up so much storage other places in my kitchen! Best thing I ever put on a wall in my life! Glad you liked it! ❤ Thanks for reading!
LikeLiked by 1 person